Fast & tracked delivery
Your dose of creativity arrives quickly at your home, you can track your package right to your mailbox.

The site owner may have set restrictions that prevent you from accessing the site. Please contact the site owner for access.

🧡 JOY! Tip: Our complete self-hardening clay kit contains everything you need to easily shape, dry, and decorate your creations.
Self-hardening clay is ideal for crafting at home. Easy to mold, with no baking required, it allows you to create all sorts of decorative or practical objects with children...or just for fun!
But once your masterpiece is shaped, the question remains: how do you harden the clay without cracking or warping it? In this guide, we'll explain step by step how to successfully dry self-hardening clay, avoid common mistakes, and protect your creations over time.
Unlike conventional clay, self-hardening clay does not require any oven baking . It simply hardens upon contact with air , thanks to the evaporation of the moisture contained in the paste.
It is generally composed of cellulose, mineral powders, natural binders and water. Its curing time depends on several factors:
💡 Good to know: the surface may appear dry in a few hours, but the inside of the object can remain damp for several days . It is therefore better to wait before moving on to the painting or varnishing stage.
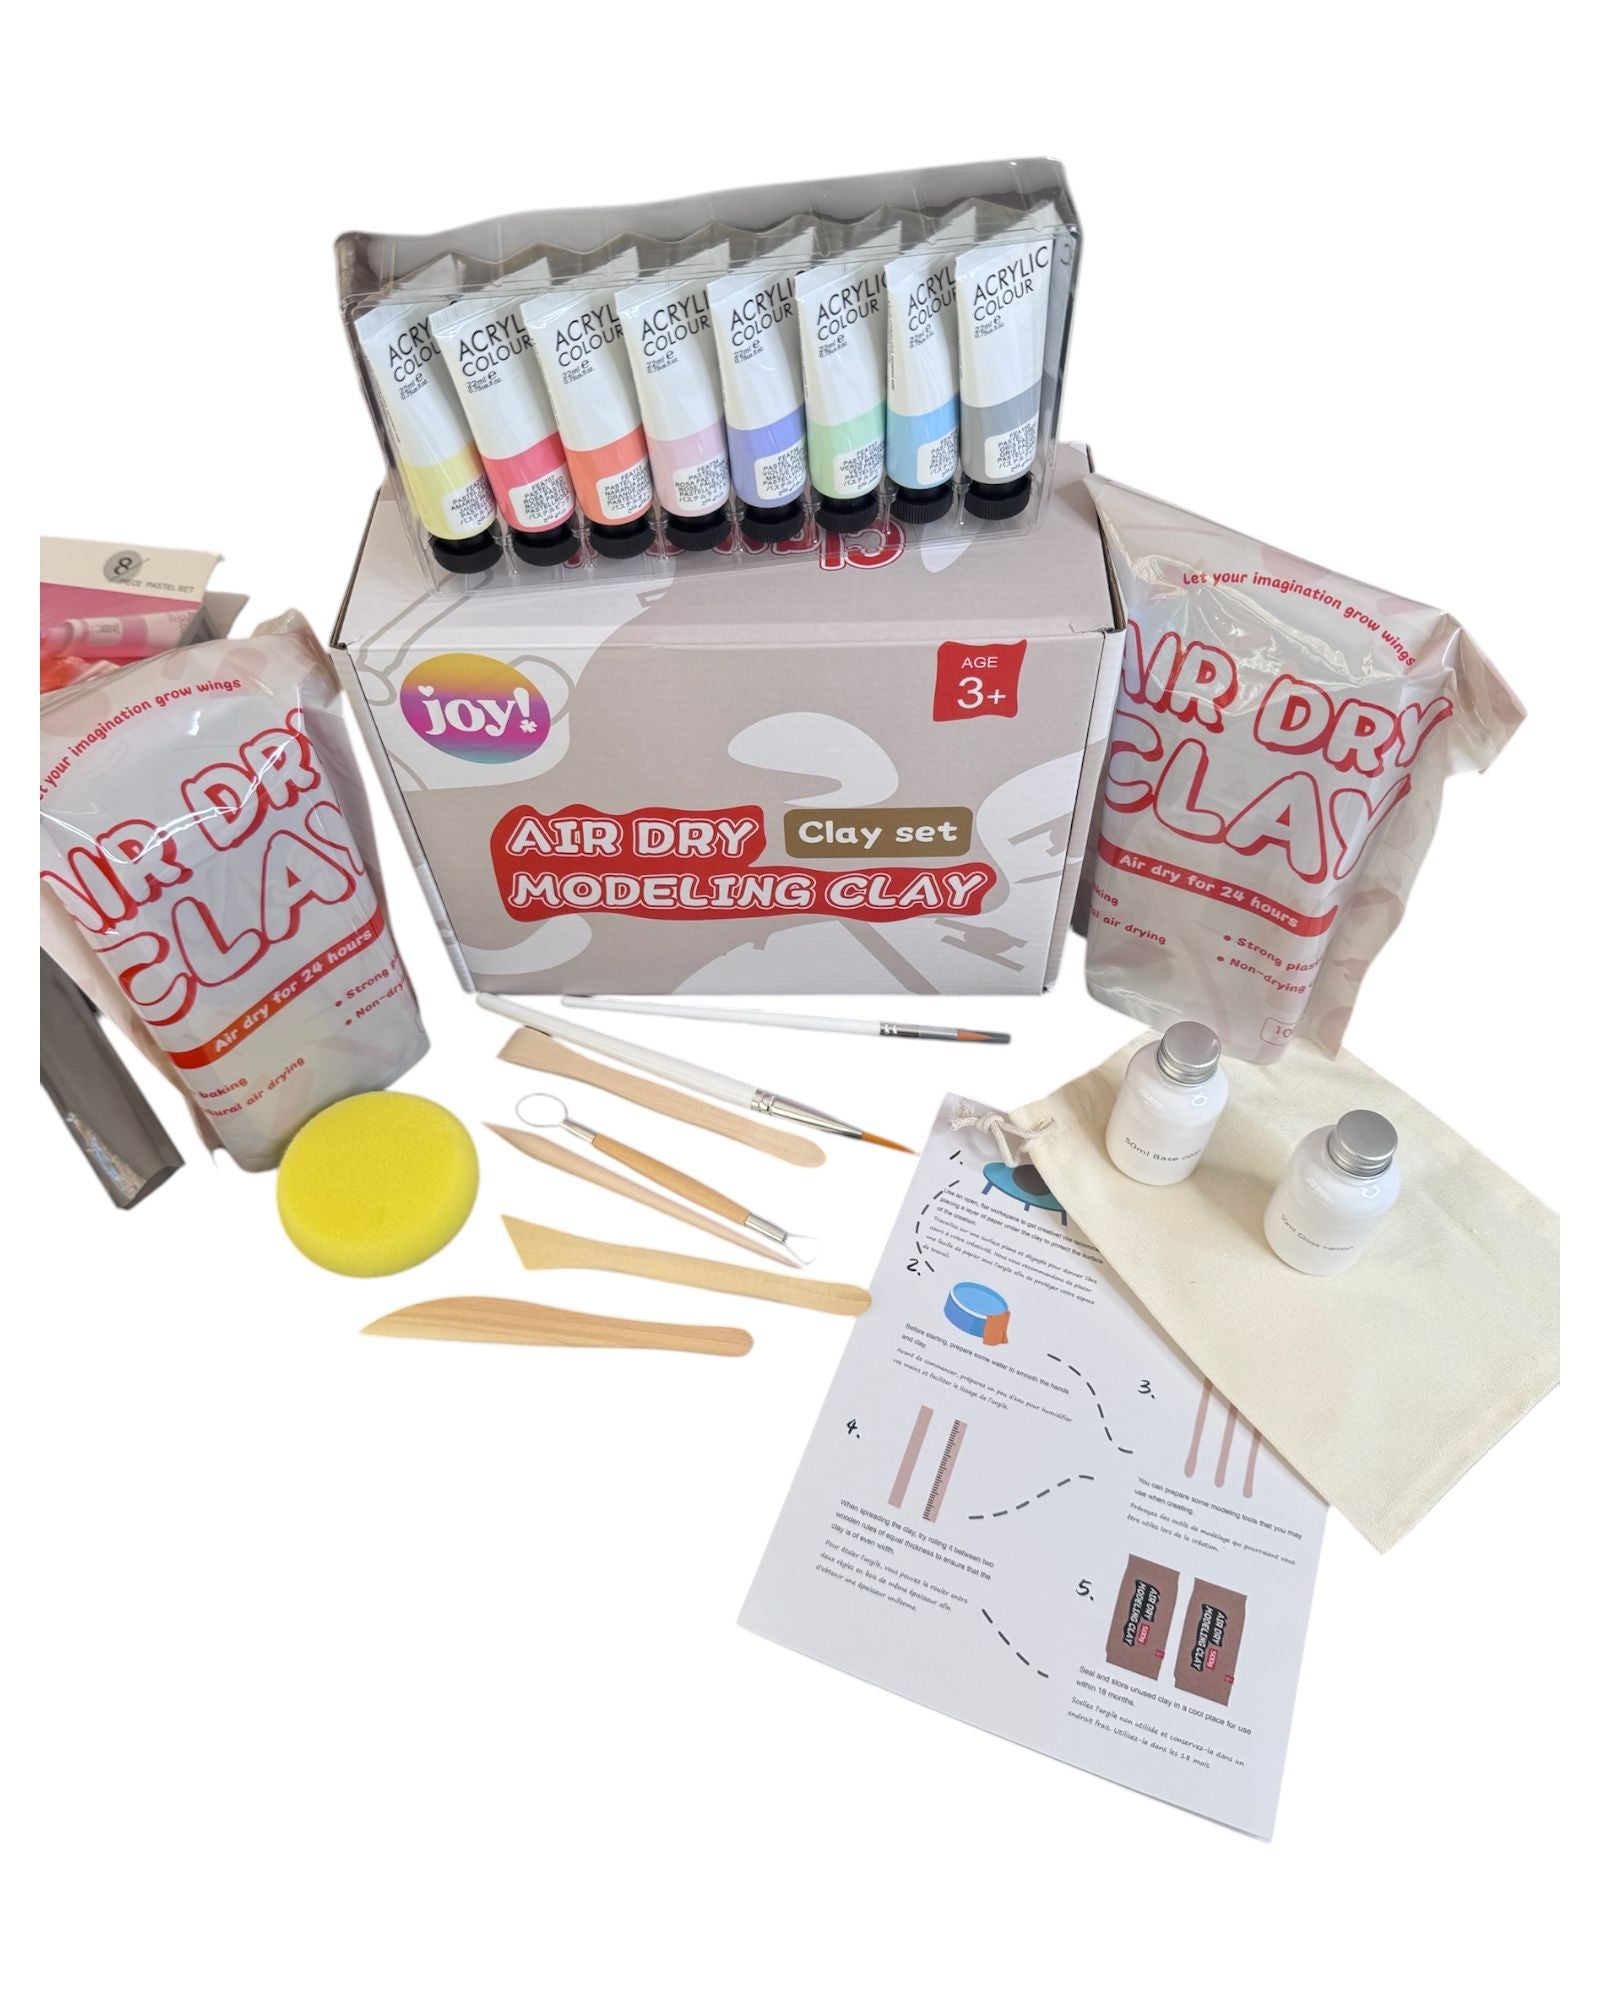
Everything you need to successfully create your self-hardening clay creations: soft clay, modeling tools, pastel paints, brushes, and varnish. Ideal for beginners or as a gift!
Try self-hardening clay ✨Proper drying begins with the modeling phase . Even before letting your creation harden, certain simple steps can prevent cracks, deformations or crazing :
💡 JOY! Tip : For children or creative little hands, choose simple, flat shapes at first. They're easier to achieve... and quicker to dry!

Discover our selection of self-hardening clays to easily create your decorative objects and DIY projects. Easy to mold, no baking required, and available in several colors.
See our self-hardening modeling clay kits ✨Self-hardening clay hardens naturally in the open air. This is the simplest and safest method.
Here are some good practices to adopt:
⚠️ Do not try to speed up by placing your piece near a radiator or using a hair dryer: this dries the surface too quickly and causes internal cracks.
The temptation is great to speed up drying, especially when children want to paint their creation within the hour... but be careful: drying too quickly can do more harm than good .
Here's what's possible — and what's best avoided:
💡 JOY! Tip : If you're in a hurry, make several small creations instead of one large object. They'll be ready to paint the next day!

Even with all the precautions in the world, sometimes a piece of self-hardening clay will develop small cracks or lose its shape slightly as it dries. Don't panic, these problems can often be corrected.
💡 JOY! Tip : Always keep a small ball of clay tightly wrapped. It can be used for last-minute touch-ups, even days after your initial creation.
Once the self-hardening clay is completely dry (including the core), it is time to move on to the finishing touches to embellish and protect your work.
💡 JOY! Tip : If you're just starting out, consider our creative kits with self-hardening clay . They contain everything you need (dough, tools, tutorial) and make it easy to get started.
Can you put self-hardening clay in the oven to make it harden faster?
Avoid! Self-hardening clay is designed to air dry. Putting it in the oven may cause cracks or even burns on the surface. Instead, allow it to dry naturally in a dry, ventilated area.
How long does it take for self-hardening clay to dry completely?
On average, allow 24 to 72 hours depending on the thickness of the piece, temperature, and humidity. For thick creations, it may be necessary to wait up to a week before applying paint or varnish.
How to prevent self-hardening clay from cracking when drying?
Work with an even thickness, avoiding areas that are too thin or too thick, and let it dry slowly, away from direct drafts. You can lightly cover the piece with a cotton cloth for the first few hours for more gradual drying.
Can you repair a crack in self-hardening clay?
Yes. Use a mixture of fresh clay and water (slip) as a glue to fill the crack, then let it dry again. At JOY!, we include an illustrated guide in some of our clay kits to easily repair or touch up your creations.
Should self-hardening clay be sanded after drying?
This isn't mandatory, but it gives a smoother, more professional finish. Use very fine sandpaper, then dust off before painting or varnishing.
What type of varnish should I use to protect self-hardening clay?
A water-based acrylic varnish is recommended for indoor use. For outdoor use, choose a waterproof varnish. In the JOY! creative kits, we offer suitable finishes that preserve the color and texture of the clay.
How to store unused self-hardening clay?
Wrap it in plastic wrap, place it in an airtight bag, and store it at room temperature, away from heat and sunlight. You can add a damp cloth to the bag to prolong its flexibility.

Laetitia Jandric
Founder of JOY! · Creative Leisure Expert
A mother of three and founder of JOY! since 2022, Laetitia selects and tests each creative kit before listing it. Her articles combine practical advice, field experience feedback, and concrete recommendations to help everyone find the activity or gift that truly fits.
Learn more →
Your dose of creativity arrives quickly at your home, you can track your package right to your mailbox.

Got a problem? Don't panic, you have 15 days to change your mind.
Creative activities for young and old (from 0 to 77 years old!), perfect for disconnecting from screens and spending real time together.

JOY! is fun, colorful, and a touch of madness to dust off your creative leisure activities!