Fast & tracked delivery
Your dose of creativity arrives quickly at your home, you can track your package right to your mailbox.

A complete guide to getting started with self-hardening clay (also called air dry clay).
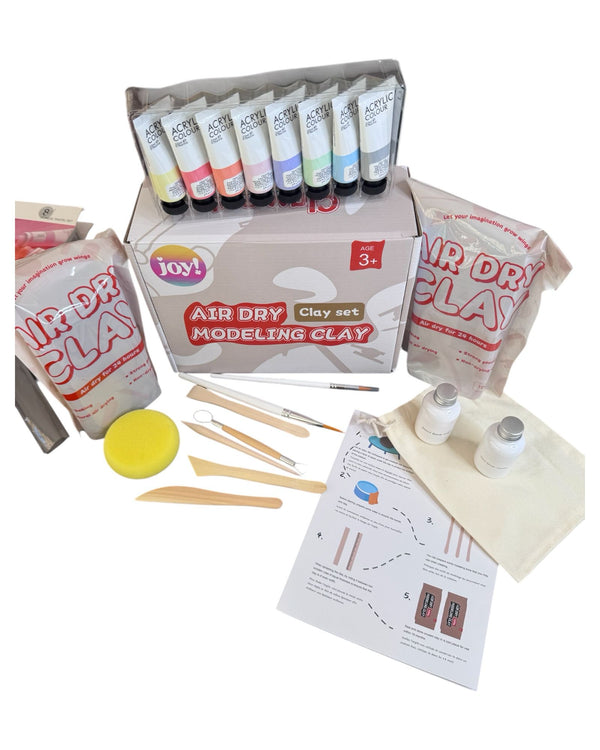
Great deal: Joy! kits contain everything you need to get started: dough, tools, pastel colors, varnish... try it out without moderation!
Easy to handle, no baking required and full of creative possibilities , self-hardening clay (or air dry clay ) is an ideal activity for young and old. Whether you are a parent, teacher or DIY enthusiast, this guide will take you step by step to learn how to use it, avoid common mistakes and create your first works with ease.
Self-hardening clay is a flexible clay that hardens naturally in the air , without the need for baking. It can be used to create decorative objects, figurines, jewelry, or various accessories. Unlike salt dough or classic clay, it remains light, smooth , and does not require an oven.
It is suitable for both children (from 5 years old) and adults. It is a non-toxic material , easy to knead, and which keeps very well if stored correctly.
Good to know: self-hardening clay is also sold under the names "air dry clay", "DAS self-hardening clay", or "Fimo Air".
To get started, you will need:
Tip: Our kits contain everything you need to get started with ease (dough, tools, pastel colors, varnish). Ideal for families or as a creative gift!
To save time and get started with peace of mind, discover our selection of complete kits : self-hardening paste, tools, pastel paints and varnishes... everything is included to have fun from the moment you open it!
See the self-hardening modeling clay kits ✨Before you begin, knead the dough well between your hands for 1 to 2 minutes. This makes it softer and more pleasant to work with. If it's a little dry, lightly moisten your fingers.
Once completely dry:

The perfect set for creating beautiful hand-made decorations: soft clay, modeling tools, pastel paints, and varnishes included. Easy to use, even for beginners!
Try self-hardening clay 💛Here are some simple DIY projects to make:
💛 To go further, discover 10 ideas for objects to make from clay and self-hardening modeling clay
Yes, here is a simple homemade recipe that we offer you on JOY!:
Mix everything together in a saucepan over low heat until you get a smooth paste. Let it cool before using. It's less durable than store-bought paste, but it's ideal for a try!
A kit is particularly useful if:
No, self-hardening clay, like the one offered on JOY!, is designed to air dry naturally . It should definitely not be put in the oven: this could crack, burn, or make it brittle. Let it dry gently, ideally on a cloth or felt.
Yes, absolutely. It's even an excellent activity for sensory and creative development . JOY! offers kits suitable for ages 3 and up. The texture of the dough stimulates fine motor skills and helps develop the imagination. For younger children, it's simply recommended to accompany them (use suitable tools, gentle handling).
Cracks most often appear due to rapid drying or improperly prepared paste. To avoid them:
Yes, of course. Acrylic is most commonly used, but you can also:
In any case, we recommend that you varnish your creation once the paint is dry, to protect it from humidity and improve its durability over time.
Commodo lorem morbi aliquam dui turpis. Iaculis pretium poses nulla tincidunt blandit. A at elementum faucibus integer.

Your dose of creativity arrives quickly at your home, you can track your package right to your mailbox.

Got a problem? Don't panic, you have 15 days to change your mind.

Creative activities for young and old (from 0 to 77 years old!), perfect for disconnecting from screens and spending real time together.

JOY! is fun, colorful, and a touch of madness to dust off your creative leisure activities!
